Curriculum
Python on IoT Devices
Hello World
0/6


Hello World Supplemental
0/3
Python + Visual Studio Code + FileZilla
0/4
GPIO Inputs
0/6
Rotary Encoder
0/4
Pulse Width Modulation (PWM)
0/4
State Machine
0/4
BLE
0/4
Traffic Lights
0/5
1.1: Getting Started
Setting up your Raspberry Pi
Raspberry Pi have developed a graphical SD card writing tool that works on Mac OS, Ubuntu 18.04, and Windows called Raspberry Pi Imager; this is the easiest option for most users since it will download the image automatically and install it to the SD card.
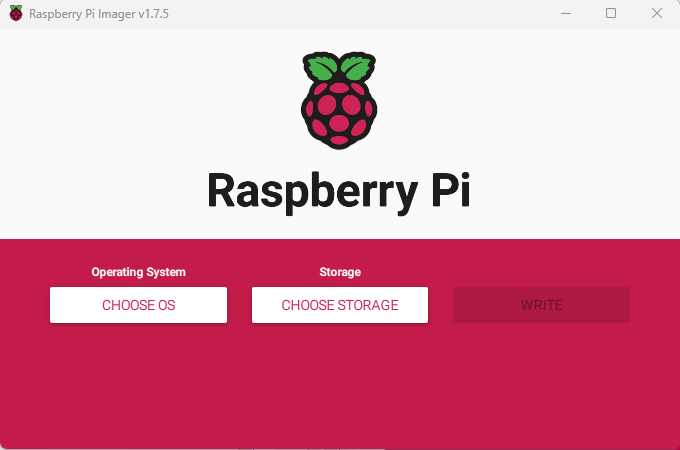
After downloading the latest version of Raspberry Pi Imager and installing it, to prepare your Raspberry Pi Zero W’s Operating System:
- Connect an SD card reader with the SD card inside
- Open Raspberry Pi Imager and choose the required OS from the list presented. As part of this lesson, we’ll be selecting Raspberry Pi OS (other) > Raspberry Pi OS Lite (32-bit).
- Configure Advanced Options.
- Choose the SD card you wish to write your image to.
- Review your selections and click on the
Writebutton to begin writing data to the SD Card.
As we are using a headless Raspberry Pi setup in this lesson, you’ll have to configure the Advanced Options.
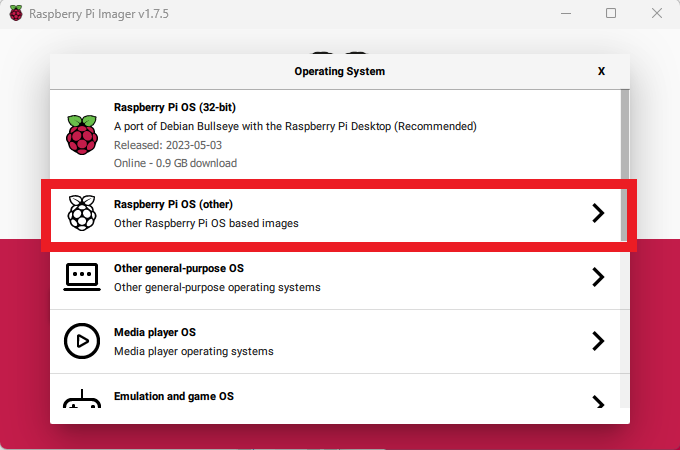
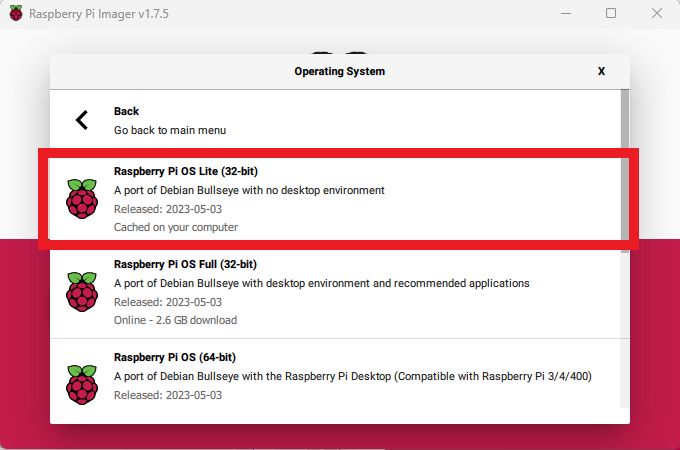
NOTE:
Headless Raspberry Pi means it is not connected to a display or monitor via HDMI or keyboard.
Advanced Options
When you have the Raspberry Pi Imager open, and after you have selected the operating system to install, a cog wheel will appear allowing you to open an “Advanced Options” menu if it is supported by the operating system. This menu lets you carry out tasks like enabling SSH, or setting your Raspberry Pi’s hostname, and configuring the default user before first boot.
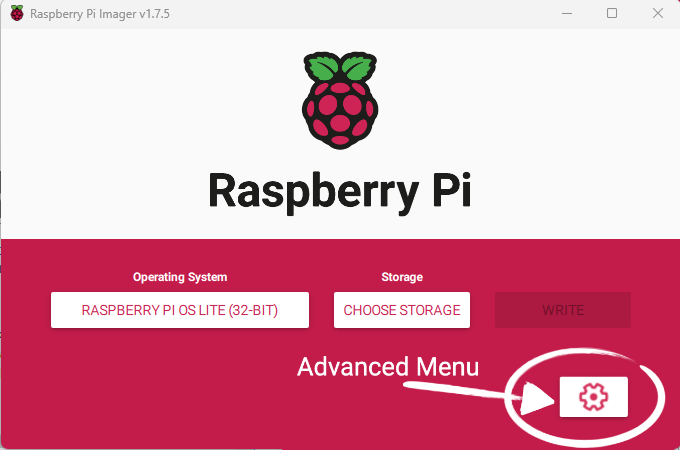
Since we are installing Raspberry Pi OS Lite and intend to run it headless, you must create a new user account since you will not be able to create the user account on first boot. You MUST configure the operating system using the Advanced Options menu.
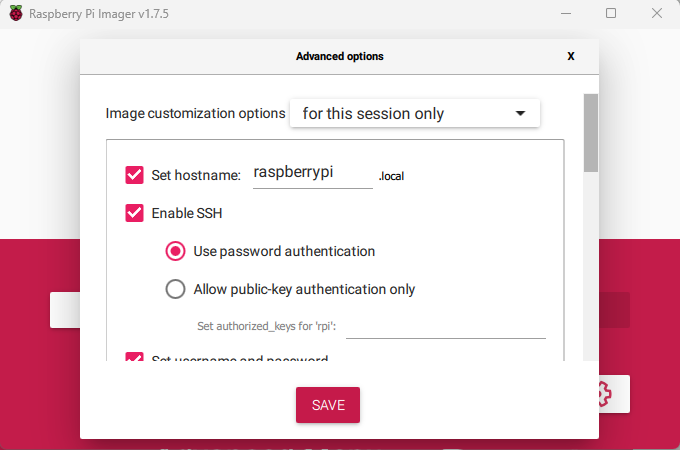
Make a note of the hostname, username, and password you set for future lessons.